
This post may contain affiliate links. I may receive compensation if you sign up for or purchase any products through the links below. As an Amazon Associate and affiliate marketer for many other businesses, I earn from qualifying purchases. Please read my disclosure for more information.
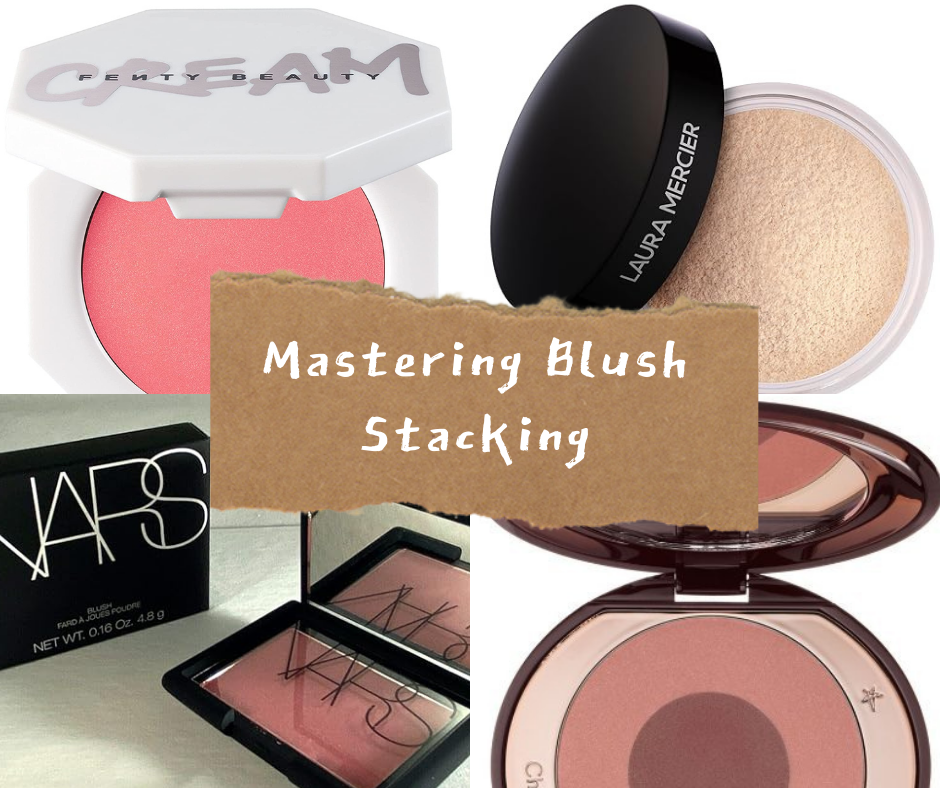
Blush stacking is an innovative makeup technique that involves layering different types of blush formulae to enhance the natural radiance of the skin. This method is pivotal for achieving a vibrant and fresh complexion, providing depth and dimension to the face. Rather than relying on a single shade of blush, makeup enthusiasts and professionals alike have found that combining various tones and textures can result in a more dynamic appearance. By thoughtfully selecting and layering multiple shades, one can create a customized look that highlights the unique features of their face.
Utilizing blush stacking allows for the manipulation of color intensity and the creation of gradients that mimic the natural flush of the skin, evoking a more lifelike effect. This technique not only helps in achieving a glowing look but also contributes to the overall longevity of the makeup by allowing for more versatile application. The art of blush stacking can involve various formulations, such as cream, powder, and liquid blushes, each contributing different finishes and textures that can be interlayered for optimal results.
Moreover, understanding how to effectively stack blush is essential for anyone looking to elevate their makeup routine. Layering lighter shades underneath deeper hues can add a stunning luminosity, while contrasting colors can gain attention by drawing the eye to specific facial features. Ultimately, the practice of blush stacking is an essential skill for those wishing to create a lively visage. This article will provide a comprehensive guide on how to master blush stacking, ensuring that your makeup reflects a radiant and healthy-looking complexion.
Choosing the Right Blushes
When delving into the art of blush stacking, a crucial first step is to select the appropriate blush shades and formulas that will enhance your complexion. Blushes come in various formulations, each with its unique properties and applications. The three primary types of blush available on the market are powder, cream, and gel, and understanding their distinctions can significantly impact the overall effect of your makeup look.
Powder blush is a classic choice, known for its ease of application and variety of finishes—from matte to shimmery. It tends to work well for those with normal to oily skin types, as it provides a lightweight and buildable coverage. If you’re opting for powder blush, consider shades with soft hues such as peach or soft pink that can blend seamlessly into the skin.
Cream blush, on the other hand, boasts a creamy texture that delivers a dewy finish. This formulation is particularly beneficial for individuals with dry or mature skin, as it hydrates while imparting a natural flush. Richer colors like berry or plum can add depth to your cheeks, especially when layered correctly in a blush stacking technique.
Gel blushes offer a unique blend of both powder and cream, providing a lightweight application with a hint of moisture. They dry to a translucent finish, making them ideal for creating a fresh, youthful look. When selecting gel blush, soft coral or rosy shades often yield a lively and radiant complexion.
In addition to choosing the right formulation, it is equally important to select colors that harmonize with your skin tone. Those with warmer undertones may find that shades of peach, coral, and apricot bring out their natural glow. Conversely, cool undertones often look best in pinks, plums, and mauves. By understanding the types of blushes available and selecting colors that complement your complexion, you will set the foundation for a beautiful blush stacking technique.

Preparing Your Skin for Blush Stacking
Before you embark on your journey to mastering the art of blush stacking, it is essential to prioritize proper skin preparation. A well-prepared canvas allows for smoother application and optimal blendability of the blush products, ensuring a radiant and flawless complexion. The first step in this process is cleansing. Start by removing any dirt, oil, or makeup from the previous day using a gentle cleanser suited to your skin type. This will help create a clean base for your subsequent skincare and makeup products.
Once your skin is clean, the next key step is to moisturize. Hydration plays a crucial role in the skin’s texture and appearance. Choose a moisturizer that is appropriate for your skin type—whether it is lightweight gel-based for oily skin or a richer cream for dry skin. Adequate moisture will prevent the blush from settling into fine lines or dry patches, allowing for a more even and polished look.
Following the moisturizer, applying a primer is essential for enhancing the longevity of your makeup, particularly when stacking different blush products. A good primer creates a smooth barrier between the skin and makeup, minimizing imperfections and allowing for a seamless application of blush. Choose a primer that complements your skin type and concerns; for example, a mattifying primer for oily skin or a hydrating primer for dry complexions.
Incorporating these steps—cleansing, moisturizing, and priming—into your skincare routine ensures an ideal foundation for blush stacking. By fostering an environment that enhances blendability and wear, your blush products will ultimately look more vibrant and natural. Proper skin preparation not only makes application easier but also contributes significantly to the overall effectiveness of your blush stacking technique.
Step 1: Applying Base Blush
Achieving a radiant complexion begins with the application of a base blush, serving as the foundation for further layering. For optimal results, it is crucial to choose a base blush that complements your skin tone, ensuring a seamless blend. Cream blushes tend to provide a dewy finish, while powder blushes offer a matte appearance. Begin by selecting the product that best aligns with the desired outcome for your complexion.
Before applying the blush, prepare your skin by ensuring it is clean and well-moisturized. Applying a primer can enhance the blush’s longevity and create a smooth canvas. Using a makeup sponge or a brush, pick up a small amount of your chosen base blush. It is advisable to start with a minimal product amount, as it is easier to build on than to remove excess. Gently tap the applicator to remove any excess product before application.
When it comes to the actual technique, smile to reveal the apples of your cheeks, then apply the blush in a circular motion. This motion not only helps distribute the product evenly but also mimics the natural flush of the skin. For a more lifted appearance, blend the blush slightly upwards towards the temples, avoiding the temptation to apply too low on the cheeks. This approach enhances the natural contours of your face, contributing to a more youthful look.
As you assess the application, it is important to step back and examine your work in natural light to ensure the blush appears seamless and not overly prominent. The goal is to achieve a fresh, natural look that enhances your complexion without overpowering your features. Once satisfied with the base layer, you will be ready to proceed to the next step in the process of blush stacking, layering additional tones for depth and dimension.
Step 2: Adding Color with a Second Blush
In the pursuit of a radiant complexion, the addition of a second blush shade can elevate your makeup look to new heights. Selecting a contrasting color is key to achieving depth and dimension on your cheeks. For instance, if your first blush is a soft peach, consider complementing it with a deeper rose or mauve. This layering technique not only amplifies color but also allows for a more personalized and dynamic expression of beauty.
When it comes to application, the placement of the second blush is equally important. Begin by applying the contrasting blush slightly higher on the apples of your cheeks, moving towards your temples. This technique not only helps to lift the face but also enhances the cheekbone structure. Utilize a soft, tapered brush that allows for precise placement; this will enable you to blend seamlessly with the first blush while avoiding harsh lines.
As you layer the blushes, consider the blending technique that will create a harmonious transition between the two shades. Gently swirl the brush in a circular motion at the junction where the two colors meet to achieve a soft gradient effect. This will ensure that the two shades meld together beautifully, preventing any stark contrast that could detract from the overall look. Additionally, it may be helpful to review your makeup in natural light, as this will allow you to assess the balance between the two blush colors more accurately.
Ultimately, adding a second blush is an art that requires both practice and experimentation. With thoughtful color selection and careful application, you can achieve a balanced and radiant complexion that showcases your individuality. As you progress, remember to adjust your techniques according to your face shape and personal style for optimal results.
Step 3: Highlighting for Radiance
Highlighting serves as a crucial step in the blush stacking process, especially when looking to achieve a radiant complexion. When applied correctly, highlighter can enhance the layers of blush, creating an ethereal glow that elevates the overall makeup look. The key is to apply highlighter strategically, utilizing its light-reflecting properties to emphasize the high points of the face.
To apply the highlighter, use a fan brush or a small, fluffy brush to pick up the product. Tap off any excess to prevent overpowering application. Focus on areas where the light naturally hits your face— the top of your cheekbones, the bridge of your nose, and the brow bone. A small amount should be applied to the inner corners of the eyes for additional brightness. Remember, the objective is to enhance the existing blush without overshadowing it, so build up gradually.
Furthermore, consider the finish of your makeup. For those seeking a dewy look, applying a cream or liquid highlighter while the blush is still soft can help meld the products together beautifully, ensuring a seamless transition. For those preferring a matte finish, applying a subtle powder highlighter over a matte blush can add dimension and interest to your makeup without compromising style.
Highlighting is an artful addition to the makeup toolkit; executed thoughtfully, it results in a captivating and radiant complexion.
Blending Techniques for Flawless Finish
Achieving a seamless application of stacked blushes requires a mastery of blending techniques that can elevate your makeup look. The tools you choose play a crucial role in determining the degree of smoothness and polish achieved. Among the most effective tools are makeup brushes and sponges, each offering unique advantages for blending blushes.
Makeup brushes, particularly angled blush brushes or fan brushes, enable a controlled application and can help create a soft gradient on the cheeks. When utilizing a brush, it is essential to use sweeping motions rather than a dabbing technique, as this allows for better distribution of color. Opt for a brush with synthetic bristles if you’re working with cream blushes, as they facilitate an effective blend without absorbing too much product.

On the other hand, beauty sponges have gained popularity for their ability to create a naturally dewy finish. When using a damp sponge, the technique should resemble a bouncing motion applied to the skin, allowing the blush to merge flawlessly with other layers of makeup. A damp sponge can also help to diffuse pigments, which is particularly beneficial when transitioning between different hues in stacked blush applications.
Moreover, the order in which you apply and blend your blush can influence the final look. Starting with the lighter shade closer to the temple and gradually adding deeper tones can help achieve a more dimensional appearance. It is advisable to use a light hand initially, adding layers gradually until the desired intensity is met.
Incorporating these blending techniques will foster a polished finish that prevents harsh lines and ensures that the stacked blushes mesh seamlessly into your overall look. Practice and experimentation with various tools and techniques are key to developing your unique style, ultimately contributing to a radiant complexion.
Common Mistakes to Avoid
When it comes to blush stacking, several missteps can lead to an unsatisfactory appearance, undermining the radiant complexion that individuals seek. Understanding these common pitfalls can help users enhance their makeup application and achieve a balanced and flattering result. One prevalent mistake is over-application of blush. It is easy to go overboard, especially when experimenting with various shades. The key is to start with a small amount of product, building gradually to reach the desired intensity. A light hand can create a natural glow, whereas too much product can lead to a gaudy appearance.
Another common issue arises from color clashing. Using hues that do not complement each other can result in a discordant look. It is advisable to select colors that work harmoniously together. Certain combinations, such as pairing warm tones with others on the warm spectrum, or cool shades with their cool counterparts, tend to blend more seamlessly. Testing different shades on the wrist prior to application can provide insight into how they will interact on the cheeks, further minimizing the potential for clashing colors.
Additionally, achieving an unbalanced look is a prevalent concern among those new to blush stacking. It is essential to apply the blush evenly across both cheeks, ensuring symmetry for a polished appearance. A common guideline is to stand back and assess the overall look in different lighting conditions, as this can provide perspective on any discrepancies that may not be apparent up close. Remember to blend the edges well for a seamless finish. By being aware of these frequent mistakes, individuals can confidently navigate the art of blush stacking, enhancing their complexion effectively and elegantly.
Conclusion: Embracing the Art of Blush Stacking
Throughout this guide on blush stacking, we have explored the multifaceted benefits of this technique in accentuating the natural beauty of your complexion. Blush stacking involves layering different shades and formulations of blush to achieve a more dimensional and youthful glow. The method not only allows for creativity in your makeup routine but also offers a personalized approach to enhancing your overall appearance.
As we discussed, the choice of colors is paramount in this process. Selecting complementary shades can create a harmonious look that brightens your features while maintaining a natural finish. The strategic layering of creams, powders, or even gels can provide varying levels of intensity, depth, and durability, ensuring your blush lasts throughout the day. Furthermore, understanding your skin tone and undertones enhances the effectiveness of blush stacking, enabling a tailored makeup application that promotes a radiant complexion.
It is essential to remember that mastering this technique takes practice. Experimenting with different application methods—be it stippling, sweeping, or tapping—enables you to find what works best for your unique facial structure and preferences. The versatility of blush stacking gives you the freedom to switch up your look according to occasions, moods, or seasonal trends, aligning your makeup style with your individual identity.
In conclusion, embracing the art of blush stacking can significantly elevate your makeup skills and enhance your overall radiance. As you incorporate this technique into your beauty routine, do not hesitate to play with colors and textures. This experimentation not only brings joy to the makeup process but ultimately leads to a more vibrant, youthful glow that reflects confidence and personal style.